
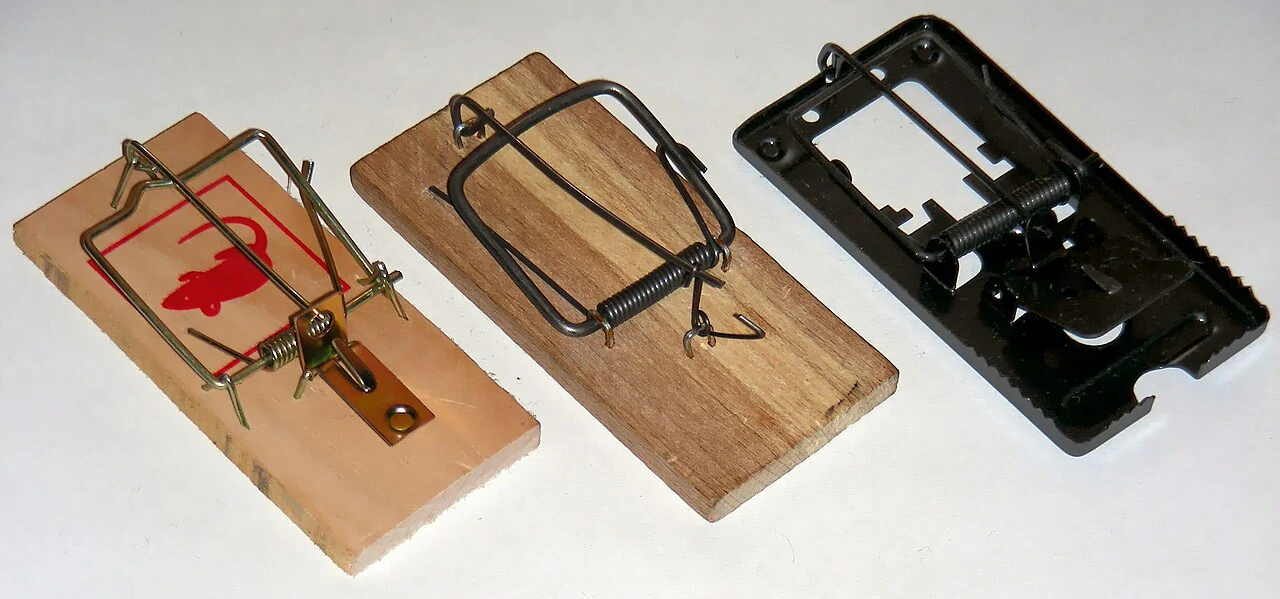
Snap traps are still one of the most reliable ways to deal with rats, but plenty of people run into the same problem.
They set a trap, and the rat either avoids it completely or steals the bait without ever tripping it. A few smart tweaks and builds can fix that.
So what are the homemade rat traps that actually work with a snap trap setup? And how do you build your own from scratch?
Homemade rat traps that work with snap traps usually involve modifying a standard snap trap: anchoring it, extending the trigger, or pre-baiting it unset. Or you can build your own trigger mechanism from wood, wire, and a spring. Both approaches solve the same problem, getting a cautious, heavier rat to actually set off the trap.
That’s the short version. But there’s a lot of ground between “buy a trap and set it” and “build one from scratch.”
Here’s a real rundown of what actually works, starting with traps you can improve, then moving into designs you can build yourself.
Why Are Rats So Much Harder to Trap Than Mice?
Before getting into specific traps, it helps to understand why rats give people so much trouble.
Rats are naturally more cautious around new objects than mice are, a trait researchers call neophobia (meaning a fear of unfamiliar things), and it shapes nearly everything about how they approach a trap.
It’s been documented extensively in Norway rats, the most common rat species around homes in the US and Canada.

A brand new trap that suddenly shows up in a space a rat already knows can get avoided for days.
That happens even with great bait sitting right on it, though mice show some of this same caution, just nowhere near as strongly.
Rats are also just physically tougher. A standard mouse trap’s spring often isn’t strong enough to kill a rat outright.
A rat can sometimes survive the snap, or drag the trap away entirely, and that combination of caution and raw strength is why so many of the tricks below focus on two things.
Get the rat comfortable with the trap first (this is the hardest part for most people to be patient about). Then make sure the trap has enough force to actually do the job once it commits.
Pre-Baiting: The Single Biggest Fix for Most Failed Setups
If there’s one homemade technique that consistently improves snap trap success, it’s this one, and it costs nothing beyond a few days of patience.
Set your trap out unset, meaning the bar isn’t cocked and won’t snap, then just place bait on it, like peanut butter or a chunk of dried fruit.
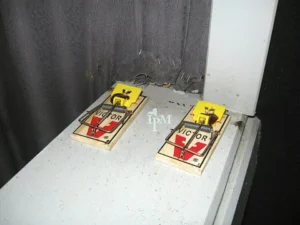
Let rats visit it freely for several days, since this directly targets the neophobia problem.
It lets rats get used to the trap as a normal part of their environment, rather than a sudden threat. Pest control trade sources describe this as standard practice for overcoming trap shyness.
Once you notice the bait is being taken regularly, that’s a sign the trap is being visited and trusted, so set it for real at that point, with fresh bait.
Your success rate goes up considerably compared to setting a brand new trap cold, and this costs you almost nothing to try.
It’s the first thing worth attempting if a normal snap trap setup hasn’t worked.
Anchoring and Extending a Standard Snap Trap
This is a basic modification that solves a common problem: rats dragging off a trap that didn’t fully finish the job.
Drill a small hole in one end of the trap’s wooden base, then run a length of wire or strong twine through it.
Tie the other end to something solid, like a nearby pipe or stake, anything that won’t move if a rat drags the trap.
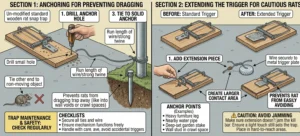
This stops the trap from disappearing into a wall void or under a floor if the rat manages to move even after being struck.
It also keeps you from losing traps in hard-to-reach spots (like crawl spaces or behind appliances).
A second common tweak is extending the trigger surface, since rats are more cautious about stepping fully onto a small metal plate than mice are.
Some people wire on an extra piece of cardboard, or a bottle cap, to make the trigger larger and harder to avoid. A bigger surface means even a light touch is more likely to set the trap off.
The Double-Trap Setup for Tougher Rats
This uses two full-sized rat snap traps rather than one. It’s a real technique, used because a single trap sometimes isn’t enough force for a large rat.
Set both traps a few inches apart, facing opposite directions, so a rat approaching from either side (left or right along the wall) has a trigger nearby.
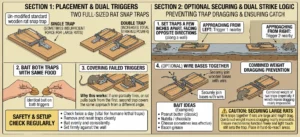
Bait both traps with the same food, so there’s no reason to prefer one over the other, and the logic here is straightforward.
If one trap only partially fires, or the rat pulls back from the first trigger, the second one covers the same approach from a different angle.
Some people go a step further and wire the two traps together at the base.
That way, a rat that drags one (assuming it survives the first strike) ends up dragging the other too.
Building a Wooden Box Trap From an Old Mousetrap Design
This is a genuinely different build from a standard snap trap, an old design sometimes called a Danish-style cell trap.
Here it’s adapted to rat scale using a wooden box, a hinged ramp, and gravity rather than a spring. You’ll need thin plywood or pine boards for the walls.
You’ll also need a smaller hinged panel for the ramp, plus a few wire rods or a thick coat hanger cut to length.
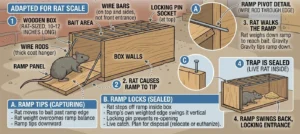
A small locking pin finishes the build, and a finishing nail works well for that.
Build a rectangular box roughly rat-sized, about 10 to 12 inches long is a reasonable starting point. Leave one end open, with wire bars across the top and sides so the rat can’t chew its way out.
At the open end, hinge a small ramp piece so it can tip downward under weight, then swing back up afterward. A wire rod through the ramp’s edge and into the box walls gives it that pivot point.
Set bait inside the box, past where the ramp sits.
A rat walking the ramp to reach the bait causes it to tip down under its weight. Once the rat steps off onto the box floor, the ramp’s own weight swings it back into place, sealing the entrance.
This is a live-catch method, not a lethal one, so you’ll need a plan for what to do with a trapped rat once you find one.
That might mean relocation (check local regulations first, since releasing invasive rats elsewhere is restricted in many areas) or humane euthanasia.
The Soup Can Mousetrap, Scaled Up for Rats
This is a genuinely clever, low-cost mechanism. It needs real scaling up from its original mouse-sized design to hold up against a rat’s strength though.
The original version uses a coffee can or large soup can with a lid, a wire coat hanger bent into a locking mechanism, and rubber bands to snap the lid shut once triggered.
For a rat-sized version, use a large coffee can rather than a soup can. Go with a heavier gauge wire than a standard coat hanger too.
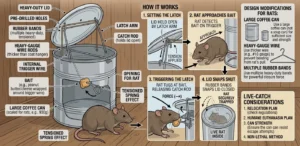
A rat pulling against thin wire can bend it out of shape before the trap ever fires. Drill holes for the wire rods around the can and through the lid.
Follow the same basic layout as the mouse version: a catch rod that holds the lid open, hooked to a latch arm that releases when bait is disturbed.
Bait wraps around the catch mechanism itself, rather than sitting loose inside, so pulling at the bait is what triggers the release.
Once tripped, the rubber bands snap the lid shut, trapping the rat inside the can. This is another live-catch design, so the same considerations about what to do with a caught rat apply here too.
Using a Five Gallon Bucket as a Snap Trap Backstop
This isn’t a snap trap on its own, but it’s a genuinely useful combination worth knowing about.
Set a standard rat-sized snap trap on a narrow board, positioned right at the edge of a 5 gallon bucket, with the trigger end facing outward, then bait the trap as you normally would.
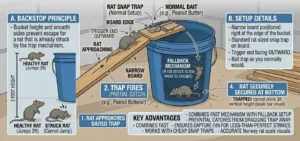
If the trap only partially fires, or a rat manages to get free after being struck, the bucket does the rest. Its height and smooth sides mean a rat that falls in usually can’t climb back out.
Norway rats can jump roughly 3 feet vertically, according to pest management research. But a rat that’s already been struck by a trap generally can’t manage that.
This setup basically gives you a backup for a snap trap’s occasional partial catch. It combines a fast mechanism with a fallback that a plain snap trap alone doesn’t offer.
Does Trap Size Really Matter That Much?
This isn’t really a build, but it’s one of the most common reasons a homemade or store-bought snap trap setup fails outright.
A standard mouse trap is genuinely too small and too lightly sprung for most rats. Its spring often lacks the force to kill a rat cleanly.
Its trigger plate is also sized for something far lighter, according to Catchmaster’s comparison of rat and mouse trap design.
A study comparing large and small snap traps on wild rats found the larger traps caught prey at more than double the rate of smaller ones, 9.9% success versus 4.4%.
That gap came down to force and trigger coverage.
The bigger traps could apply enough pressure and cover enough trigger area to work reliably.
If you’re modifying or building your own trap, don’t scale down. A rat-sized build, whether store-bought or homemade, needs real size and force behind it, not just a bigger version of a mouse trap’s shape.
What Bait Actually Gets a Trap Triggered?
The mechanism matters, but so does what’s sitting on it, since rats are pickier than people expect.
Peanut butter remains a solid default, since it’s sticky enough that a rat has to work at it directly rather than nibbling from a safe distance.
Bacon, dried fruit, and nesting materials like cotton balls are also worth rotating in. Cotton balls work especially well in colder months (rats will pull at material for warmth, not just food).
Rotating bait matters more with rats than with mice, since rat populations can develop preferences based on what’s regularly available in their environment, according to pest industry behavior research.
A bait that worked well last month might get ignored if the local rats have simply had their fill of it.
If a trap sits untouched for several days despite good placement, try switching the bait before you touch the trap itself.
Where to Place These Traps for the Best Results
Even the best-built trap catches nothing in the wrong spot. Rat travel habits are fairly predictable once you know what to look for.
Rats travel along walls, edges, and consistent paths, rarely crossing open floor space the way a bolder animal might.
Set traps flat against a wall, ideally somewhere you’ve already noticed droppings or gnaw marks. Grease marks left by a rat’s fur brushing the same surface repeatedly are another good sign.

Perpendicular placement, with the trigger end facing out into the rat’s path, tends to get better results than a trap sitting flush alongside the wall.
For a live-catch box or can trap, placement matters just as much. These need to sit directly in a travel path, rather than somewhere a rat would need to go out of its way to investigate.
Conclusion
There isn’t one single homemade rat trap that beats all the others. Each of these solves a slightly different version of the same problem.
Pre-baiting fixes caution. Anchoring and double-trap setups fix strength and follow-through. The wooden box or soup can builds offer a live-catch option a standard snap trap can’t.
If you’re just trying to get more out of a snap trap you already own, start with pre-baiting and proper sizing. Those two things alone fix most failed setups without needing to build anything.
If you want a genuine DIY project, the wooden box trap and the scaled-up soup can design both give you something entirely different from a store-bought trap.
You can build either from parts you likely already have around the house.
Whichever method you land on, remember that rats are tougher and more cautious than mice. It’s worth giving a new trap time to earn their trust before assuming it’s failed.

Hi, my name is Ezra Mushala, i have been interested animals all my life. I am the main author and editor here at snakeinformer.com.