
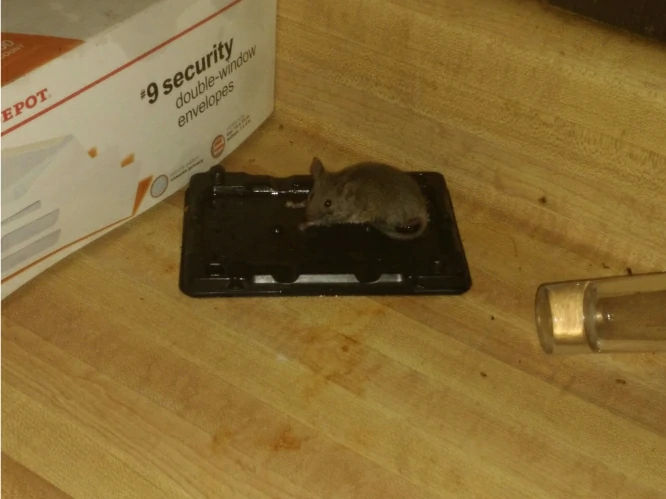
Store-bought glue traps can get expensive, especially if you’re dealing with a real mouse problem and need to set out several at once. That’s enough to make anyone wonder if they could just make their own at home.
After all, how hard can it be to create something sticky enough to trap a mouse? So how do you actually make a homemade glue trap for mice?
Making an effective DIY glue trap for mice is genuinely difficult, and it’s usually not worth the effort. You can create sticky surfaces using tree sap, corn syrup, or tape, but these homemade versions won’t reliably hold a mouse, and they tend to be messy and unreliable.
Commercial glue traps use a specially formulated adhesive built for this exact job. Trying to recreate that with kitchen ingredients or craft supplies almost never works.
You’ll likely end up frustrated and covered in sticky mess instead of catching anything.
Why Are DIY Glue Traps So Hard to Make?
The adhesive in commercial mouse glue traps is a specialized product that took years to develop. It needs several specific properties that are genuinely hard to copy at home.
The glue has to be sticky right away. It can’t take time to dry or set, because a mouse will just walk off before it does.
That means you need what’s called a pressure-sensitive adhesive (one that grabs the instant something touches it, rather than needing time to bond).
Jon Seidman CC BY-NC-SA 2.0
It also has to stay sticky for weeks, sometimes months.
Most household glues and sticky substances dry out, collect dust, or lose their tackiness within days. Commercial trap glue is built to hold its stickiness far longer than that.
The adhesive also has to be strong enough to hold a struggling animal.
Even though a mouse only weighs about half an ounce to an ounce, a small, fast, determined animal fighting to get free is a tougher test than something merely feeling sticky to your fingers.
It needs to work across a range of temperatures and humidity levels too. A trap that works fine in your kitchen might stiffen up in a cold garage or lose its grip in a damp basement.
On top of all that, the glue has to be safe if touched, since pets and kids might come into contact with it. That rules out a lot of industrial adhesives that would otherwise be sticky enough to do the job.
Materials People Try, and Why They Don’t Work Well
Despite the challenges, people try all kinds of materials for a homemade glue trap. Here are the most common attempts, and where each one tends to fall apart.
Duct tape or packing tape.
This seems like an obvious choice since it’s already so sticky. Some people lay strips sticky-side-up across a piece of cardboard.
The problem is that tape adhesive isn’t strong enough to hold even a lightweight mouse (roughly half an ounce to an ounce) once it starts pulling to get free. It can usually work itself loose within seconds.
Honey and corn syrup mixtures.
These can get very sticky and gooey once boiled down into a thick paste. But this kind of stickiness is different from true adhesive stickiness.
It’s closer to getting your hands dirty than actually being glued in place. A mouse can usually pull its feet free without too much trouble.
Tree sap or pine resin.
This is naturally sticky, and it was actually used in old-fashioned traps long before modern glue boards existed. Heating it makes it more liquid and workable.
The issue is that it hardens fast as it cools, so by the time you’ve set the trap, it might already be too stiff to catch anything. It’s also incredibly messy to work with.
Wood glue or craft glue.
These are designed to bond two things together, which sounds promising, but they need real time to dry and set. A mouse can walk straight through wet glue before it ever has a chance to bond.
Double-sided carpet tape.
This is stickier than regular tape (closer to what you’d use for a rug) and holds a bit better as a result. It still usually isn’t strong enough to keep a determined mouse stuck for long.
Petroleum jelly mixed with flour or sugar.
This makes a sticky paste, but it won’t actually trap anything. It just slows a mouse down for a moment before it walks off with messy feet.
The Most Common DIY Method People Try
If you’re set on attempting this despite the challenges, here’s the method most people use.
It’s still worth knowing upfront that it’s nowhere near as effective as a commercial trap.
You’ll need a sturdy piece of cardboard (about 12 inches by 12 inches works well), several rolls of heavy-duty packing tape, scissors, and a bit of bait like peanut butter.
K. Latham CC BY-NC-SA 2.0
Cut strips of tape long enough to cover most of the cardboard’s surface. If you’re using single-sided tape, lay it down sticky-side-up.
If you’re using double-sided tape instead, peel off the backing to expose the sticky surface underneath.
Lay the tape strips across the cardboard in rows, covering as much of the surface as you can and leaving only small gaps between strips.
Secure the edges to the cardboard so the tape doesn’t curl up over time.
If you’re using single-sided tape, you may need to tape the ends to the underside of the board to keep everything flat. That part gets sticky and a little fiddly.
Place a small amount of peanut butter right in the center of the trap to draw the mouse toward the sticky surface.
Set the trap flat against a wall where you’ve noticed mouse activity, since mice travel along edges and this puts the trap directly in their path.
Check it often. Even if you do catch a mouse, homemade tape often doesn’t hold for long, so you’ll want to deal with it before it manages to escape.
Why Tree Sap Traps Are Especially Difficult
Some people try the old-fashioned route using tree sap or pine resin instead of tape or syrup. It’s a more traditional method, but also a much more complicated one.
You’d need to collect fresh sap, which means finding a tree that’s actively oozing it and scraping enough off to work with. That alone can take a while.
Heat the sap gently to make it more liquid and workable, ideally in a pot on low heat. Be careful here, since sap is flammable, and the smell tends to be strong and unpleasant indoors.
While it’s still warm and liquid, spread it across a board or a thick piece of cardboard. You’ll need to work quickly, since it starts hardening again as soon as it starts to cool.
Wearing gloves helps here, since this stuff gets messy fast.
Add bait to the center while the sap is still tacky. There’s only a narrow window where the consistency is actually right for trapping anything.
The biggest problem is that pine sap fully hardens into a solid once it cools.
If a mouse doesn’t happen to step on it during that brief sticky window, the trap simply won’t work. Getting the timing right is close to impossible.
On top of that, removing hardened pine sap from anything is extremely difficult, including from a mouse that did get stuck.
It doesn’t dissolve easily, and you’ll likely end up with sap on your hands, your floor, and anything else nearby.
The Honey and Corn Syrup Method
This is another common try that sounds promising but tends to fall short in practice.
Mix equal parts honey and corn syrup in a pot, and add a bit of sugar if you want it stickier still. Heat it on the stove, stirring constantly so it doesn’t scorch.
Bring it to a boil and let it cook for several minutes, reducing the water content until it thickens and turns slightly brown.
Pour the hot mixture onto a piece of cardboard or a wooden board, spreading it across most of the surface. Be careful here, since the mixture is extremely hot and can cause a serious burn if it gets on your skin.
Let it cool slightly until it’s no longer scalding but still very sticky. This is your window to set the trap, and you can add a bit more bait to the center if you’d like.
The core problem is that this mixture doesn’t form a true adhesive bond, even though it looks convincing at first.
It’s sticky in the sense that it’s gooey and clings to a mouse’s feet, but the mouse can usually still pull away without much trouble.
It’s more like stepping in mud than stepping on real glue.
This method also tends to attract ants and other insects, since the sugar content is a magnet for every bug in the house. You may end up with more insects on the trap than mice.
Using Store-Bought Adhesives Instead
Some people try repurposing other adhesives meant for entirely different jobs. This works a little better than kitchen ingredients, but it still comes with real drawbacks.
- Spray adhesives (the kind made for crafts) can coat a surface with a sticky layer. But these are built to stick paper to paper, not to hold a moving animal, so they’re rarely strong enough.
- Construction adhesive (something like Liquid Nails) is very strong, but it needs real time to cure. It won’t grab a mouse on contact, and by the time it’s sticky enough to hold anything, it’s already dried solid.
- Rubber cement stays tacky for a while after you apply it, which makes it tempting to try.
The bond it forms is weak though (easy to peel apart even when dry). A mouse can usually pull free without a lot of effort.
- Contact cement is designed to bond two surfaces together on contact, which sounds ideal.
But it actually needs to be applied to both surfaces and left to dry before they’re pressed together, which doesn’t work at all for something moving.
- Mouse trap glue refills (sold in some stores as a standalone product) are basically just commercial trap glue in a different package.
This is probably your best option if you’re determined to build your own trap. At that point though, you might as well just buy a complete one.
Does This Method Also Raise Welfare Concerns?
Even setting effectiveness aside, it’s worth knowing that glue traps, whether homemade or store-bought, come with a real animal welfare debate attached.
A glue trap doesn’t kill quickly, and a trapped mouse is usually still alive.
Depending on how often the trap gets checked, it can stay stuck for hours or even days.
Organizations like Humane Society International have documented mice showing labored breathing and exhaustion.
In some cases, mice have shown broken bones or torn skin from struggling against the glue.
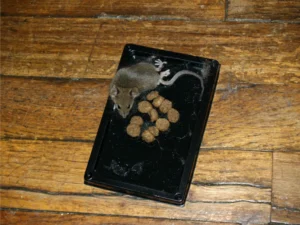
The British Veterinary Association has stated it considers glue traps inhumane, and public use has already been banned in England, Ireland, New Zealand, and Iceland on welfare grounds.
That concern has reached North America too, even without a formal ban here.
Target and Dollar Tree have both quietly stopped selling glue traps, following CVS, Rite Aid, and Big Lots, according to reporting that cited PETA.
A poorly made homemade trap tends to make this worse rather than better.
If the glue isn’t quite strong enough to hold a mouse fully, it can partly stick and drag the trap around while struggling.
That causes more suffering than either a clean catch or no catch at all.
Safety Issues With DIY Traps
Making your own glue trap creates a few practical hazards you should know about before you try it.
Getting homemade adhesive on your skin can be genuinely hard to remove.
Unlike commercial trap glue, which is formulated to be safe and easy to clean up, some DIY mixtures might irritate your skin or trigger an allergic reaction.
Hot sugar mixtures can cause serious burns. Boiling honey or corn syrup gets far hotter than boiling water, and a spill can leave a much worse burn than you’d expect.
Kids and pets are at risk too if they get near a homemade trap.
Commercial traps are tested and certified safe, but your homemade version is really just whatever you put into the pot. You can’t always be sure what happens if a pet gets into it.
Fire is a real hazard if you’re heating sap or resin, since these materials can catch fire if they get too hot or come near an open flame. A kitchen stove isn’t the safest place to be melting tree sap.
Mess and cleanup are also close to guaranteed. Homemade sticky substances are hard to clean up once they spill, and you may end up with a permanently sticky patch on your floor or counter.
Why Commercial Traps Are Usually Worth the Money
After considering everything involved in making a DIY glue trap, it’s easier to see why buying a commercial one tends to make more sense.
They’re genuinely cheap, and that’s the first thing most people notice.
A multi-pack usually runs just a few dollars, and once you factor in your own time and the cost of materials, making your own often isn’t actually cheaper.
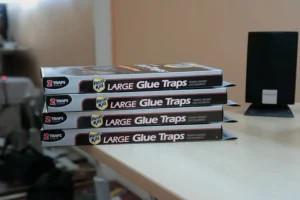
They work far more reliably too. The adhesive is formulated specifically to trap mice rather than repurposed from something meant for baking, crafting, or shipping boxes.
They’re safer as well, since the glue is tested and certified safe, so you don’t have to guess what might happen if your family or pets come into contact with it.
They’re also cleaner and far easier to set up. There’s no melting, mixing, or spreading involved. You just take one out of the package and place it where you need it.
They hold their stickiness far longer as well. A commercial trap can sit out for weeks and still catch mice, while a homemade version is more likely to dry out or collect enough dust to stop working within days.
Disposal is simpler too, since commercial traps are designed to be thrown away with whatever’s caught still attached. A DIY version can fall apart or make a bigger mess when it’s time to get rid of it.
Better DIY Alternatives to a Glue Trap
If the appeal here is building something yourself rather than buying a trap off the shelf, a few other DIY methods actually work well, without the same downsides.
A homemade snap trap is much easier to build than a working glue trap. Simple wooden designs are available online, and they work well when built correctly.
Bucket traps are effective and easy to make too. You’ll need a 5 gallon bucket, a length of wire or a rod, an empty can (a soda can works fine), and some bait.
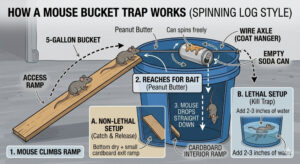
A mouse climbs a ramp to reach bait balanced on a spinning can, and once it steps onto the can, it drops into the bucket below, where it can’t climb back out.
This works as either a live-catch method or a kill trap, depending on how you set it up.
Bottle traps can catch mice too. Cut the top off a plastic bottle, invert it, and fit it back inside to create a one-way funnel entrance.
Add bait inside, and a mouse can get in, but the design makes it hard to get back out.
Natural deterrents are the gentlest DIY option, though they won’t solve a serious problem on their own.
Peppermint oil and ultrasonic devices are sometimes used to discourage mice from an area rather than trap them outright.
When to Call a Professional Instead
Sometimes the DIY approach just isn’t the right call, especially once a mouse problem has grown past what a few traps can fix.
If you’re dealing with a serious infestation involving multiple mice, DIY methods alone probably won’t be enough.
Pest control professionals have access to better tools and more effective methods than most people can use at home.
When mice are getting into hard-to-reach places, like inside walls or up in an attic, you’ll have a hard time setting any kind of trap effectively on your own. Professionals have the equipment to reach those spots.
If you’ve tried DIY or store-bought traps for several weeks with no success, that’s usually a sign it’s time to get help. You’re losing time while the problem just keeps growing.
If you or someone in your home has a weakened immune system, it’s best to avoid handling traps or mouse droppings yourself. The risk of disease from direct exposure is real.
And if the whole idea of dealing with a trapped mouse makes you uncomfortable, there’s no shame in having someone else handle it. Pest control is their job, not yours.
Conclusion
Making a DIY glue trap for mice is technically possible, but it’s rarely practical or effective. Tape, tree sap, and sugar mixtures can all get sticky, but none of them reliably hold a mouse the way a real adhesive does.
Commercial trap glue is specially formulated to grab on contact, stay sticky for weeks, and hold a struggling animal in place.
That combination is genuinely hard to recreate at home.
Given the time, mess, and materials involved in making a trap that might not even work, buying a commercial one usually makes more sense.
They’re already quite inexpensive to begin with.
If you’re interested in DIY pest control for its own sake, you’re better off building a bucket trap, a bottle trap, or a simple snap trap instead.
If you do decide to try making your own glue trap anyway, be careful.
Hot sugar mixtures can burn you, homemade adhesive is a genuine mess to clean up, and materials that aren’t tested for safety might not be something you want around pets or kids.
And remember that a trap that doesn’t quite work is often a crueler trap, not a kinder one.
A mouse that’s only partly stuck can end up suffering longer than one that’s caught cleanly or not caught at all.

Hi, my name is Ezra Mushala, i have been interested animals all my life. I am the main author and editor here at snakeinformer.com.