
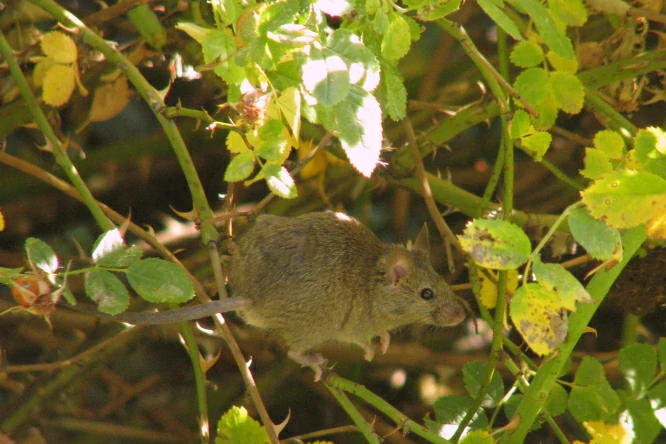
A bucket mouse trap is one of those things that sounds too simple to actually work. But it’s been used on farms, in garages, and in cabins for years.
It does work, and often better than the snap traps sitting in your kitchen drawer. If you’ve got mice getting into your food or chewing on things in the garage, you might be wondering how to make a mouse trap out of a 5 gallon bucket.
It’s a project you can finish in one afternoon with tools most people already own.
To make a mouse trap out of a 5 gallon bucket, drill two holes near the top on opposite sides and run a rod through a spinning object like a soda can. Coat the can with peanut butter, then lean a ramp against the bucket. When a mouse climbs up for the bait, the can spins and drops it inside.
That’s the short version, but there’s more worth knowing here. The bait you use, the ramp, and whether you add water to the bucket all change how well this works, and what happens to the mouse once it’s in there.
Why a Bucket Works So Well Against Mice
Mice are small, but they’re not fragile. A house mouse can jump about a foot straight up (roughly 10 inches, per University of Nebraska extension research) and climb almost any rough surface with ease.
That’s exactly why a plain bucket sitting on the floor won’t catch anything on its own.
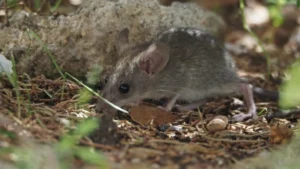
The trick is the height combined with the smooth plastic sides. Most 5 gallon buckets stand about 14 to 15 inches tall, and that’s just past how high a mouse can jump.
Once it falls in, there’s nothing to grip on the way up. It can’t climb the way it could scale a wood beam or a brick wall, since a house mouse’s claws need something rough to dig into.
That’s really the whole reason this trap works. No spring, no snap, no poison, just a bucket that’s too tall for a mouse to jump out of and too smooth for it to climb.
Is a Bucket Trap Actually Better Than a Snap Trap?
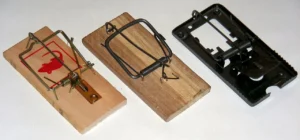
For a small problem, not really. One or two mice getting into your kitchen will likely fall for a couple of well-placed snap traps (the kind you find at any hardware store) just as fast as a bucket setup.
Where a bucket trap pulls ahead is volume, and that’s really the whole story once mice start breeding.
A single female can have 5 to 10 litters a year, with 5 to 6 pups each litter. A small problem can turn into a big one within a few weeks.
A snap trap catches one mouse, then it’s done until you reset it, and if you’re dealing with a handful of mice in a garage or shed, that means checking and resetting constantly.
A bucket trap, especially the flip-lid version covered later on, can catch several mice in a row without you doing anything in between. That’s the real advantage: less babysitting, more catching.
What You Need to Build One
You don’t need much, and most of it is stuff you probably already have lying around the house or garage.
- A 5 gallon bucket
- An empty soda can, or a short piece of PVC pipe
- A wire coat hanger, a thin metal rod, or a wooden dowel
- A drill
- Peanut butter, oats, or dry pet food for bait
- A board, a piece of scrap wood, or a stick for the ramp
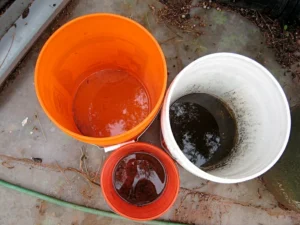
The bucket is the one thing you shouldn’t swap out for something smaller. A shorter container, like an old paint can, just won’t work as well, since this whole trap depends on the mouse not being able to jump back out.
Building the Basic Bucket and Spinner Trap
This is the classic version, and it’s the one most people mean when they talk about a bucket mouse trap.
Start by drilling a small hole on each side of the bucket, near the top edge but below the rim, making sure the holes line up so your rod can pass straight through both sides.
Next, push the rod or wire through your soda can lengthwise, right through the center. You want the can to spin freely on the rod, almost like a rolling pin.
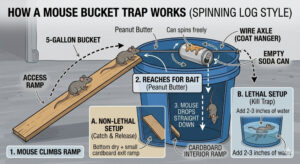
If it’s too tight, the whole design falls apart, since the spinning motion is what actually dumps the mouse into the bucket.
Slide the rod through the bucket’s holes so the can sits suspended right in the middle. It should hover just above the bucket’s opening, not off to one side.
Bend the ends of the wire slightly if you need to stop it from sliding out on its own.
Coat the can generously with peanut butter.
Some people also work in a few oats or a sprinkle of dry cat food. Both hold their smell longer than peanut butter alone, and that extra draw can make a real difference on the first night.
Finally, lean your ramp against the outside of the bucket so a mouse can climb up to the rim. A mouse walking along the rim will try to step onto the can to reach the bait.
Since the can spins freely, it can’t hold the mouse’s weight in one spot. The mouse rolls right off and drops into the bucket below.
Deciding Whether to Add Water
This is where people split into two camps, and it’s worth understanding both before you set up your trap.
Some people add 4 to 6 inches of water to the bottom of the bucket. This turns the trap into a kill trap, since a mouse that falls in can’t climb out and eventually drowns.
In cold weather, people often mix in a little antifreeze (regular automotive antifreeze works). This stops the water from freezing solid and cuts down on the smell while the bucket sits out for days at a time.
If you’d rather not deal with that, skip the water and use the trap as a live catch instead. The mouse falls in, can’t climb the smooth sides, and just waits there until you check the bucket.
You’d need to check it daily though, since a mouse can’t survive long in a dry bucket without food or water.
Neither option is wrong here. It comes down to what you’re comfortable with, and how often you can realistically check the trap.
The Flip-Lid Version That Resets Itself
If you don’t want to keep resetting your trap after every single catch, a flip-lid design solves that problem. Instead of a spinning can, you build or buy a lid that balances on top of the bucket like a see-saw.
A mouse walks across the lid to reach bait placed on the far side. Its weight tips the lid down and drops it into the bucket below.
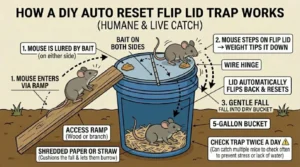
The lid then swings back to a flat resting position on its own. That means the trap is ready for the next mouse without you touching a thing.
You can buy these lids fairly cheap, and most are built to snap right onto a standard 5 gallon bucket.
If you’d rather build your own, the basic idea is a lid balanced on a center pivot, with just enough weight bias so it settles back to flat after tipping.
This version tends to work best in barns, garages, and sheds. That’s where you’re usually dealing with repeat mice, and don’t want to check the trap every few hours.
Placing the Trap Where Mice Actually Travel
Even a well-built trap won’t catch much if it’s sitting in the wrong spot. Mice rarely wander far from their nest, usually staying within 10 to 30 feet of it.
They also travel along walls and edges rather than crossing open floor space, so a bucket sitting in the middle of a room is basically invisible to them.
Put your bucket trap right up against a wall, ideally near where you’ve already seen droppings, gnaw marks, or a clear travel path.
If mice have been getting into a cabinet or pantry, set the trap close by rather than out in the open. That’s usually the fastest way to get a catch.
Look for the signs pest control researchers usually point to: small rod-shaped droppings about a quarter inch long, gnaw marks on cardboard or soft wood, and greasy rub marks along baseboards.
A dusty, musky smell in a closet or cabinet is another sign worth checking for.
The ramp matters here too, since a mouse won’t usually jump straight onto a bucket rim from the floor without some kind of path up.
A short board, a piece of scrap wood, or even a stack of old books angled against the bucket works just fine.
What to Do Once You’ve Caught a Mouse
If you went the water route, you’re dealing with a dead mouse, and the main thing here is handling it safely rather than just tipping the bucket into the trash.
Wear gloves before you touch anything in the bucket. Wild mice (and especially deer mice) can carry hantavirus in their droppings and urine. Disturbing that mess can send tiny particles into the air.
Its important to wet any droppings down first, using a bleach solution (about 1.5 cups of bleach per gallon of water). Let it sit for a few minutes, then wipe it up with a paper towel.
Don’t sweep or vacuum it dry, since that’s exactly how those particles end up airborne, and airborne is how you’d actually breathe them in.
If you’re using a live catch version, release the mouse somewhere well away from your home, ideally a few hundred yards out.
Releasing it right outside your door just means it’ll probably find its way back in within a day or two.
Either way, rinse and dry the bucket before setting it up again. A bucket that still smells like a dead mouse won’t pull in new ones as easily, since mice tend to steer clear of anything that smells like danger.
Why Does Peanut Butter Works So Well as Bait?
Peanut butter isn’t just a convenient thing to smear on a can, it actually lines up with how a mouse’s senses work.
A house mouse’s sense of smell is sharp enough to pick up scent down to about 250 parts per billion, according to University of Nebraska Extension research.
That’s strong enough to catch the smell of peanut butter from well across a room, long before the mouse ever sees the trap.
Mice also lean toward grain-based foods when they have the choice, based on food preference studies out of CSIRO in Australia.
That’s exactly why mixing in a few oats or a bit of dry pet food alongside the peanut butter tends to outperform peanut butter alone. You’re stacking a food mice are drawn to on top of a scent that already carries.
Texture plays a role too. Peanut butter is thick and sticky, so it clings to the can instead of falling off or drying out fast, which keeps the scent working for days instead of hours.
Common Mistakes That Stop This Trap From Working
A few small setup mistakes are why some people say bucket traps don’t work, when really the trap was just built wrong.
The most common one is a spinner that’s too tight on the rod. If the can or dowel doesn’t spin freely, a mouse can balance on it and just walk across to steal the bait without ever falling in.
Another common issue is using a bucket that’s too short. Swap in a smaller container, like an old paint can, and a mouse might be able to jump right back out the way it got in.
Skipping the ramp is another one. Mice will sometimes find their own way up using nearby boxes or furniture, but a clear, obvious path gets you far more catches than hoping they figure it out on their own.
Using too little bait, or bait that’s dried out, is another quiet killer.
Peanut butter mixed with a few oats holds its smell far longer than peanut butter on its own. Refresh it every few days if the trap hasn’t caught anything yet.
Finally, some people set the trap somewhere mice barely pass through, like the middle of a garage floor. Move it closer to a wall or a known travel path and you’ll usually see results within a night or two.
Does This Method Work on Rats Too?
Not really, and it’s worth knowing before you rely on one for a rat problem.
A Norway rat (the kind most common around homes in the US and Canada) can jump about 3 feet straight up, according to USDA Wildlife Services research. That’s roughly triple what a mouse can manage.
A standard 14 to 15 inch bucket that easily traps a mouse is nowhere near tall enough to stop a rat.
Rats are also strong climbers, and given a rough surface (or a wall to brace against) they can often work their way back out of a container a mouse would be stuck in for good.
Some people scale the same idea up using a taller container instead, like a 55 gallon drum. That gives you the same drop-trap setup, just without the rat being able to reach the top edge.
It’s a bigger, heavier project though, and not something you’d want sitting in a kitchen or garage corner.
If you’re only dealing with mice, a standard 5 gallon bucket is exactly the right size. It’s tall enough to stop a mouse, but light enough to move around easily when you need to check or empty it.
Conclusion
A 5 gallon bucket trap works because it uses a mouse’s own instincts against it. Mice are curious, they’ll climb toward food, and once they’re inside a tall, smooth-sided bucket, they simply can’t get back out.
Whether you build the classic spinning can version or a self-resetting flip lid, the setup takes maybe twenty minutes and a handful of parts you likely already have around the house.
If you’re dealing with just one or two mice, a snap trap might solve your problem faster.
But if you’ve got an ongoing mouse problem in a garage, shed, or barn, a bucket trap can outwork several snap traps combined. It’ll keep catching mouse after mouse without you having to reset anything in between.
Whichever version you build, remember to handle any catch carefully. Mouse droppings and urine can carry real health risks if you’re not careful during cleanup, so a pair of gloves and a bit of patience go a long way.

Hi, my name is Ezra Mushala, i have been interested animals all my life. I am the main author and editor here at snakeinformer.com.