
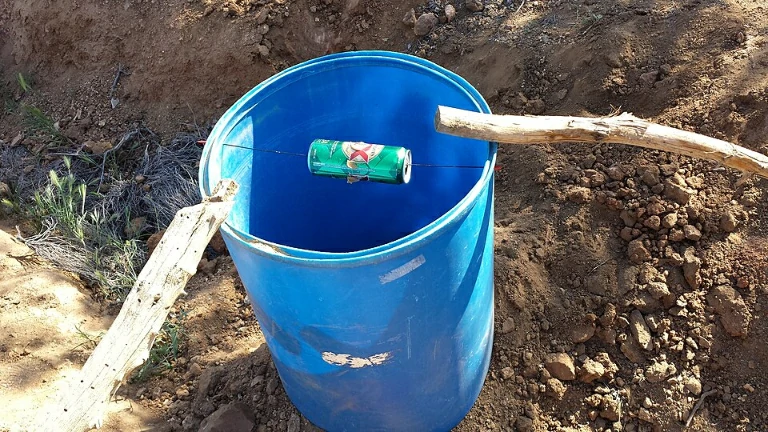
Catching a rat in a bucket trap is only useful if you know how to handle what comes next. Disposing of a rat properly matters both for your own safety and for keeping the area around your home clean. So how do you actually dispose of rats caught in a bucket trap?
Dispose of a drowned rat by placing it in a sealed plastic bag while wearing gloves, then putting it in an outdoor trash bin with a secure lid. Always wash your hands thoroughly afterward, even if you wore gloves during the process.
While this might sound simple, there are a few extra steps worth knowing. They help make sure you’re doing this safely and keeping your household protected from any bacteria the rat might be carrying.
Why Proper Disposal Actually Matters
It might be tempting to just toss a dead rat somewhere quickly and move on. But rushing this step can actually create more problems than it solves.
Rats can carry bacteria like salmonella, and wrong disposal increases your chances of coming into contact with it.
Leaving a dead rat out in the open, even briefly, can also attract other animals like flies, stray cats, or other wildlife looking for an easy meal.
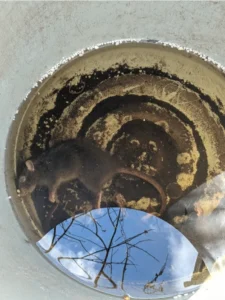
This can create a bigger mess and even more potential exposure to bacteria.
Taking a few extra minutes to dispose of the rat properly protects your health and keeps your yard or home clean. It also avoids drawing unwanted attention from other pests or animals.
There’s also a practical side to this that goes beyond just health concerns. Properly disposing of a rat means you can reset your trap and get back to dealing with your rat problem right away.
You won’t be leaving a mess for later, when you’re less prepared for it.
Think of disposal as the final step that closes out one successful catch and gets you ready for the next one.
Skipping steps might save a minute or two now, but it usually creates more work, and more risk, down the line.
Gathering What You Need Before You Start
Before you approach the trap, it helps to have a few things ready. Disposable gloves are a must, since they create a barrier between your skin and any bacteria on the rat’s body.
You’ll also want a couple of sealable plastic bags. Ideally, go with sturdy ones like contractor bags or thick trash bags, since thin bags can tear more easily.
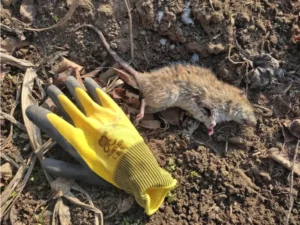
A small tool like tongs, a shovel, or a stick can also help you avoid direct contact.
Having everything within reach before you start makes the whole process quicker. It also reduces the chances of needing to touch something with bare hands because you forgot a step.
It’s a good idea to keep a small disposal kit somewhere accessible, like a garage or shed, rather than searching for gloves and bags each time.
A simple container with a few pairs of gloves, some sturdy bags, and a pair of tongs covers everything you’ll need.
Keeping this kit stocked and ready means you won’t be tempted to skip steps or improvise with whatever’s nearby. That’s often when mistakes happen and unnecessary risks get taken.
Step by Step: Removing the Rat From the Bucket
Start by putting on your gloves before touching anything related to the trap. This includes the bucket itself, not just the rat, since bacteria can be present on the outside too.
Using your tongs, shovel, or another tool, carefully lift the rat out of the water and place it directly into your first plastic bag. Try to avoid excess splashing or spilling water during this step.
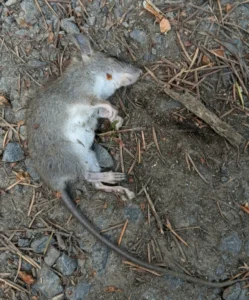
Once the rat is in the bag, tie it off securely, then place that bag inside a second bag for extra protection. Double bagging helps prevent leaks, tears, or any smell from escaping before it reaches the trash bin.
Try to work over a flat, stable surface during this process, rather than trying to balance the bucket while lifting the rat out.
Setting the bucket down on the ground first gives you more control.
If the water in the bucket looks murky or has debris in it, be extra careful while lifting the rat out, since it can be harder to see exactly where you’re grabbing. Taking your time here is worth it, even if it feels like a task you want to rush through.
Where to Dispose of the Bag
Once your rat is securely double bagged, the next step is getting it into an appropriate trash bin. An outdoor trash bin with a tight fitting lid is the best option, since it helps contain any smell.
Avoid placing the bag in an indoor trash can, even temporarily. The smell can build up quickly, especially in warm weather, and it’s just not necessary when an outdoor bin works just as well.
If your regular trash pickup is still several days away, double check that your bin has a secure lid to prevent animals from getting into it.
If you’re concerned about the wait, some people choose to bury the bagged rat instead. Several inches deep, in a spot away from gardens or areas where digging pets might disturb it, works well.
If you go with burial, aim for a depth of at least a foot or two, since a shallow burial can be dug up by curious pets or wildlife.
Choose a spot away from where you grow food, and away from any wells or water sources on your property.
Whichever method you choose, trash bin or burial, the goal is the same. Make sure the rat is fully contained and won’t be disturbed by animals or become a source of bacteria exposure for anyone else.
Cleaning Up After Disposal
After the rat has been disposed of, there’s still a bit of cleanup involved. Start by cleaning your bucket thoroughly with soap and hot water, scrubbing the inside walls and rim.
If you used a spinning rod or bait station as part of your trap, clean that too. Leftover bait residue and any contact with the rat can leave bacteria behind on those surfaces as well.
A diluted bleach solution can add an extra layer of disinfection if you want to be thorough. Just make sure to rinse everything well afterward and let it dry completely.
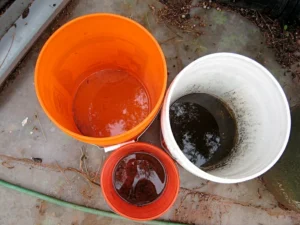
A simple mix of about one part bleach to ten parts water works well for this kind of cleaning. Apply it with a sponge or cloth, let it sit for a few minutes, then rinse thoroughly with clean water before the bucket is used again.
Cleaning outdoors, rather than in a kitchen sink or bathroom, is generally a better choice for this task. If you do need to clean indoors, a garage sink or utility sink works better than anywhere food is prepared.
What to Do With Your Gloves and Tools Afterward
Once you’ve finished disposing of the rat and cleaning the bucket, it’s time to deal with your gloves and tools
. Disposable gloves should be removed carefully, turning them inside out as you take them off. That way the outer surface, which had contact with the rat, doesn’t touch your skin.
Throw the gloves away in the same outdoor trash bin you used for the rat itself. If you used reusable tools like tongs or a shovel, wash them thoroughly with soap and hot water. A quick wipe down with disinfectant is a good idea too.
Even if you were careful throughout the entire process, thoroughly washing your hands with soap and water afterward is an important final step. Don’t skip it.
How to Dispose of Multiple Rats at Once
If you’re dealing with a bigger infestation and catch more than one rat at a time, the same basic process applies, just on a slightly larger scale.
You can place multiple rats into the same sealed bag, as long as it’s sturdy enough to handle the extra weight.
If you’re catching rats frequently, it might be worth keeping a small stock of gloves and bags on hand. That way you’re always prepared without needing to run to the store each time.
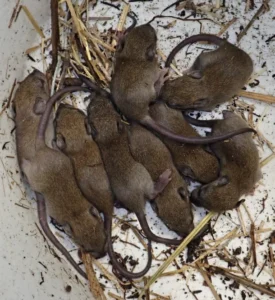
Consistently disposing of rats properly, even when you’re catching several at once, helps keep the process safe and manageable rather than becoming overwhelming.
If you’re finding multiple rats on a regular basis, it’s also worth taking a closer look at what’s drawing them to that specific area. A steady catch rate often points to something nearby, like an easy food source, that’s worth addressing alongside the trapping itself.
Are There Any Rules About Disposing of Dead Rats?
Most areas don’t have strict rules against disposing of a dead rat in your regular household trash, as long as it’s properly bagged.
Still, it’s worth doing a quick search for your specific city or county’s guidelines if you’re unsure.
Some areas may have specific guidelines around burying animals. This can include how deep they need to be buried and how far away from water sources this needs to happen.
If you’re considering burial, checking local guidelines first can save you from any unexpected issues.
A quick search online for your city or county’s animal disposal guidelines usually turns up the information you need within a few minutes.
If you can’t find anything specific, calling your local animal control office is another reliable way to get a clear answer.
Rules can also differ depending on whether you’re in a city, suburb, or more rural area. What applies to one neighbor might not necessarily apply to another, even within the same general region.
Composting Is Not a Safe Disposal Method
Some people wonder whether composting is a reasonable way to dispose of a dead rat, especially if they already have an active compost pile.
This isn’t a good idea, and it’s best avoided entirely.

Composting a dead animal can introduce harmful bacteria into your compost. That bacteria could later spread to any plants or vegetables grown using it.
Composting can also attract unwanted pests and wildlife to your compost area, creating a whole new set of problems.
Sticking with sealed bag disposal in a regular trash bin, or a proper burial following local guidelines, remains the safest and most straightforward option.
What if You Find the Rat Has Already Started to Decompose?
If you’re not checking your trap frequently, a rat can end up sitting in the bucket for a while, especially in warm weather.
It may have already started to decompose by the time you find it. This isn’t dangerous to handle as long as you take the same precautions.
Wear gloves, use a tool rather than your bare hands, and double bag the remains just like you would with a freshly caught rat. The smell might be stronger, so working outdoors and disposing of the bag right away helps minimize any lingering odor.
This situation is actually a good reminder of why checking your traps regularly matters. Catching a rat sooner rather than later makes the entire disposal process quicker and less unpleasant.
If you know you tend to forget to check traps as often as you should, setting a reminder on your phone can help.
Checking once a day, even just for a quick look, goes a long way toward avoiding this kind of situation.
In cases where decomposition has already started, work a bit faster than usual. Avoid lingering near the bucket longer than necessary.
Getting the bag sealed and into the trash bin quickly helps minimize your exposure to both the smell and any bacteria.
Conclusion
Disposing of a rat from a bucket trap really comes down to a few key steps. Wear gloves, use a tool to avoid direct contact, double bag the rat securely, and place it in an outdoor trash bin with a tight lid.
Cleaning your bucket and tools afterward, along with thoroughly washing your hands, protects you from any bacteria the rat might have carried.
Whether you’re dealing with a single rat or several at once, sticking to this same basic process keeps things safe and manageable.
Avoiding shortcuts like composting, and checking local guidelines if you’re considering burial, helps make sure you’re disposing of the rat responsibly.
With the right approach, disposal doesn’t need to be a complicated or unpleasant part of dealing with a rat problem. A few careful steps go a long way toward keeping both you and your home safe.
Once you’ve gone through this process a time or two, it becomes second nature. Keeping your disposal kit stocked and checking your traps regularly turns what might feel like an intimidating task into just another quick part of managing a rat problem.
A little preparation goes a long way here. Gloves ready, bags on hand, and a clear plan for where the bag ends up all make the difference between a stressful five minutes and a routine task you barely think twice about.

Hi, my name is Ezra Mushala, i have been interested animals all my life. I am the main author and editor here at snakeinformer.com.