
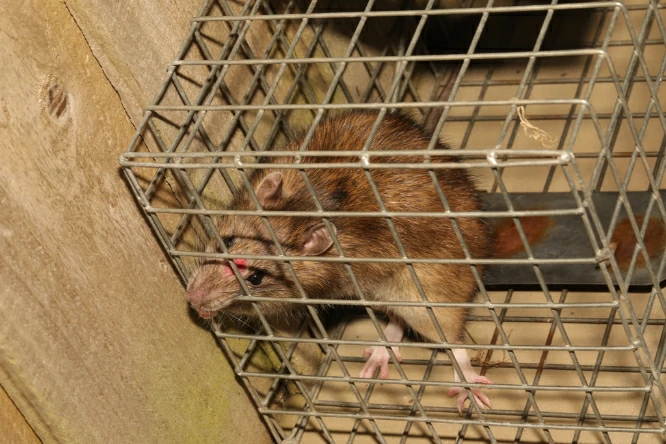
Store-bought rat cage traps can cost anywhere from $20 to $50, and if you have a serious rat problem, you might need several of them. That adds up quickly.
The good news is you can make your own rat cage trap at home with basic materials and tools. It won’t look as polished as a commercial trap, but it’ll work just as well if you build it right. How do you make a rat cage trap?
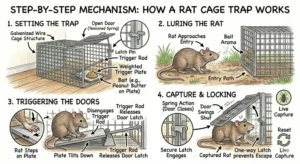
To make a rat cage trap, you need to build a wire mesh cage about 12 inches long, install a hinged door at one end that swings inward, attach a trigger plate inside connected to a simple door-holding mechanism, and add bait at the far end. When the rat steps on the trigger plate while reaching for the bait, the door releases and traps the rat inside.
Building your own trap takes a few hours and some basic skills, but it’s totally doable even if you’re not super handy. Let’s walk through exactly how to do it.
Materials You’ll Need to Build the Trap
Before you start building, gather all your materials. Having everything on hand makes the process much smoother and faster.
For the cage body, you’ll need wire mesh or hardware cloth. Get the kind with 1/2 inch openings (squares).
This is small enough that rats can’t squeeze through but large enough that you can work with it easily. You’ll need a piece about 2 feet by 3 feet for a standard rat-sized trap.
You’ll also need a piece of stiff wire or a metal rod for the trigger mechanism. Coat hanger wire works well for this. You’ll need about 2 feet of it.
For the door, you can use the same wire mesh as the cage body, or you can use a small piece of wood (about 4 inches by 5 inches). Wood doors are actually easier to work with for beginners.
You’ll need wire cutters or heavy-duty scissors that can cut through the wire mesh. Regular scissors won’t work. Pliers are also helpful for bending and twisting wire.
A hinge for the door can be made from wire loops, or you can use a small metal hinge from a hardware store. The wire loop method is cheaper but takes more skill.
Finally, grab some strong wire for tying everything together. Thin picture hanging wire or floral wire works well. You’ll also want gloves to protect your hands from sharp wire edges.
Tools That Make the Job Easier
While you can build a cage trap with just wire cutters and pliers, having a few extra tools makes the process much easier and the final product more professional-looking.
A wire bender or a sturdy pair of needle-nose pliers helps you make clean, tight bends in the wire mesh and trigger mechanism. Clean bends make the trap work more reliably.
A ruler or tape measure is essential for getting the dimensions right. Rats need enough room to fully enter the trap, so accurate measurements matter.
A marker or pencil lets you mark cutting lines on the wire mesh before you cut. This helps you cut straight lines and get the sizes right.
Some people find it helpful to have a wooden board or work surface to hold the wire mesh flat while they’re working on it. Wire mesh can be springy and hard to control.
If you’re using a wood door, a small drill and screws make attaching the hinge easier. You can do it with wire, but screws are more secure.
Safety glasses are a good idea. When you cut wire mesh, small pieces can fly off and potentially hit you in the eye. Better safe than sorry.
Building the Basic Cage Structure
Now let’s actually build the trap. Start with the main cage body. This is the easiest part and will give you confidence for the trickier parts later.
Cut your wire mesh to create a rectangular tube. For a rat trap, aim for a cage that’s about 12 inches long, 5 inches wide, and 5 inches tall. Rats need enough room to fully enter and turn around.
Lay your wire mesh flat and mark out the shape. You want one long piece that will wrap into a tube. It should be 12 inches in one direction (the length of the trap) and about 15 inches in the other direction (which wraps around to create the width and height).
Cut the mesh with your wire cutters. Cut slowly and carefully. The edges will be sharp, so watch your hands.
Bend the mesh into a rectangular tube shape. The long dimension becomes the length of your trap, and the mesh wraps around to create a box shape with no top, bottom, or ends yet.
Use your wire to tie the edges together where they meet. Twist the wire tightly every inch or so along the seam. This holds the tube shape together securely.
Now cut pieces for the back end and bottom of the trap. The back should be a solid piece that closes off one end completely. The bottom should run the full length of the trap.
Wire these pieces to your tube. Take your time and make sure all the edges are tightly secured. You don’t want any gaps big enough for a rat to squeeze through.
Creating the Door Mechanism
The door is the most important part and the trickiest to get right. This is where many homemade traps fail, so pay close attention to this section.
Cut your door piece about 1/2 inch larger than the opening at the front of your cage. If your opening is 5 inches by 5 inches, make your door 5.5 inches by 5.5 inches. This overlap is important.
If you’re using wire mesh for the door, you’ll attach it at the top edge using wire loops as a hinge. Make 3 or 4 small loops of wire along the top edge of the door and the top edge of the cage opening.
Thread a piece of stiff wire through all the loops. This creates a hinge that lets the door swing inward.
If you’re using a wood door, attach a small metal hinge at the top edge. The door should swing inward (into the cage), not outward. This is critical. An inward-swinging door traps the rat inside once it closes.
Test the door swing before you go further. It should swing inward easily and be heavy enough to swing shut on its own. If it’s too light, you might need to add a small weight to the bottom edge.
The door should swing freely but not too loosely. If it’s wobbly, tighten up your hinge attachments.
Building the Trigger Plate and Release Mechanism
This is the heart of your trap. The trigger plate is what the rat steps on, and the release mechanism is what holds the door open until the rat triggers it.
For the trigger plate, cut a small piece of stiff cardboard or thin wood about 3 inches by 4 inches. This will sit on the floor of the trap near the back end.
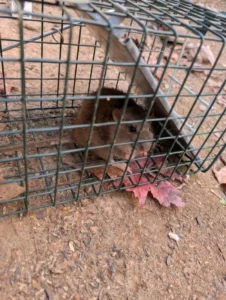
Drill or poke a small hole in the center of this plate. You’ll thread your trigger wire through this hole.
The trigger wire needs to run from the trigger plate to the door. Cut a piece of coat hanger wire about 18 inches long. Straighten it out as much as possible.
Bend one end of the wire into a small hook or loop. This will attach to your trigger plate. Thread the wire through the hole in the plate and bend it so the plate can move up and down slightly on the wire.
The other end of the wire needs to hold the door open. Bend it into a hook shape that can catch on a small notch or hole you’ll create in the door.
This is where it gets tricky. You need to create a balance where the door is held open by the wire, but when the rat steps on the trigger plate (which pulls the wire down slightly), the hook releases and the door swings shut.
Play with the angles and bends until you get it right. This might take several tries. The trigger should be sensitive enough that a rat’s weight will release it, but not so sensitive that air movement or vibrations trigger it.
Testing and Adjusting the Mechanism
Before you try to catch any rats, you need to test your trap thoroughly. This is where you work out all the bugs and make sure everything works reliably.
Set up the trap with the door held open by your trigger wire. Gently push down on the trigger plate. The door should immediately swing shut. If it doesn’t, your mechanism isn’t set up right.

Try it multiple times. Does it work consistently, or only sometimes? Consistent triggering is what you need.
If the trigger is too sensitive and the door closes when you just look at it wrong, you need to make the hook deeper or change the angle. You want it to take actual weight (like a rat) to trigger it, not just vibrations.
If the trigger is too stiff and pushing on the plate doesn’t release the door, make the hook shallower or adjust the angles. The mechanism should be delicate.
Some people find it helpful to add a small weight to the door (like a rock or bolt attached to the bottom edge). This gives the door more force when it swings shut, ensuring the rat can’t push it back open.
Also check that once the door closes, it stays closed. Some doors spring back open slightly. If this happens, you might need to add a simple latch that clicks into place when the door shuts.
Adding Bait Holders and Final Touches
Now that your basic trap works, add some features that make it more effective and easier to use.
Create a bait holder at the very back of the trap. This can be as simple as a small hook made from wire, or a tiny platform raised slightly off the floor. The idea is to hold the bait in place so rats can’t just grab it and run.
Position the bait holder behind the trigger plate. The rat should have to step fully on the trigger plate to reach the bait. This ensures the trap triggers reliably.
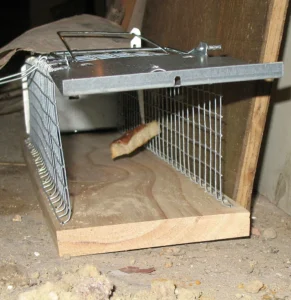
Some people add a handle to the top of the trap. This makes it easier and safer to carry the trap, especially when there’s a rat inside. Twist a piece of wire into a U-shape and attach it securely to the top of the cage.
Check all your wire edges and make sure nothing is sharp and sticking out. Sharp edges can hurt the rat or hurt you when you’re handling the trap. Use pliers to tuck in any sharp ends.
If you want to make the trap less scary-looking to rats, you can cover the outside with burlap or another breathable fabric. Some people think this makes rats more likely to enter because they can’t see through the trap as easily.
Paint or rust-proof coating isn’t necessary, but if you’re planning to use this trap outside or in damp areas, it might help it last longer. Just make sure any coating is completely dry before you use the trap, or the smell might repel rats.
Common Design Mistakes to Avoid
When building homemade traps, there are some mistakes that come up over and over. Learning from other people’s errors saves you time and frustration.
The biggest mistake is making the trap too small. Rats need enough room to fully enter and turn around. If the trap is cramped, they’ll be suspicious and might not enter at all. Aim for at least 12 inches long.
Another common error is creating a trigger mechanism that’s either too sensitive or not sensitive enough. Too sensitive means the trap goes off from vibrations or wind.
Not sensitive enough means rats can eat the bait without triggering the door. Getting this balance right takes testing.
Some people make the door swing outward instead of inward. This doesn’t work because a rat inside the trap can push the door open and escape. The door must swing inward only.
Using wire mesh with openings that are too large is another problem. Rats can squeeze through surprisingly small gaps. Stick with 1/2 inch openings or smaller.
Not securing all the seams properly is a mistake that lets rats escape. Every edge and corner needs to be wired tightly. Check your work carefully before considering the trap finished.
Finally, some people forget to smooth down sharp wire edges. This can injure the rat (which isn’t humane) or injure you when you’re handling the trap.
How Your Homemade Trap Compares to Store-Bought
You might be wondering if your homemade trap will work as well as an expensive commercial trap. The honest answer is that it depends on how well you build it.
A well-made homemade trap can work just as effectively as a store-bought trap. The basic principle is the same. A poorly made homemade trap might work sometimes but fail when you really need it to work.

Commercial traps usually have more reliable trigger mechanisms because they’re made with precision machinery. Your homemade trigger will work, but it might be finicky and require more adjustment.
Store-bought traps are often made from galvanized metal that won’t rust. Your homemade trap (unless you treat it) might rust over time, especially if you use it outdoors. This doesn’t affect how well it catches rats, but it does affect how long the trap lasts.
Commercial traps usually look neater and more professional. Your homemade trap will likely look rougher and more improvised. This doesn’t matter to the rats, but some people care about aesthetics.
The big advantage of homemade traps is cost. You can build 3 or 4 homemade traps for the price of one commercial trap. If you need multiple traps, building your own makes a lot of sense financially.
Maintaining Your Homemade Trap
Once you’ve put in the effort to build a trap, you want it to last. Proper maintenance keeps it working well for years.
After each use, clean the trap thoroughly. Use hot, soapy water to scrub down all the surfaces. Rats leave behind urine, droppings, and scent that can repel future rats if you don’t clean it off.
Check the trigger mechanism regularly. The wire can bend or deform over time, especially if rats struggle in the trap. Straighten and adjust the trigger wire as needed to keep it working smoothly.
Inspect all the seams and joints every few months. Wire ties can loosen, especially if rats chew on them. Retighten or replace any loose connections.
If you used untreated metal, watch for rust. Surface rust isn’t a big problem, but if the wire starts corroding deeply, it can weaken the trap. You can scrub off surface rust with a wire brush and coat the trap with oil to slow future rusting.
Store your trap in a dry place when you’re not using it. A garage or shed is fine. Avoid leaving it outside where rain and weather will degrade it faster.
If the door gets sticky or doesn’t swing freely anymore, clean the hinge area and maybe add a tiny drop of oil. The door needs to swing shut quickly for the trap to work right.
Troubleshooting Problems With Your Trap
Even well-built traps sometimes have issues. Here’s how to diagnose and fix common problems.
If the trap keeps going off by itself with nothing inside, the trigger is too sensitive. Adjust the wire hook to make it catch more securely on the door. You might also need to make the trigger plate heavier so small vibrations don’t move it.

If rats are eating the bait without triggering the trap, the mechanism is too stiff, or the bait is positioned too far forward. Move the bait farther back in the trap, and check that the trigger wire moves freely when you push the plate.
If rats aren’t entering the trap at all, the problem might not be the trap itself. Check your placement and bait choice. Make sure the trap is on an active rat runway and that you’re using fresh, attractive bait.
If rats are escaping from the trap after being caught, you have gaps in your cage or the door isn’t staying closed. Check all seams and add more wire ties if needed. You might need to add a latch mechanism that keeps the door shut after it closes.
Sometimes the door doesn’t swing shut smoothly. This usually means the hinge is binding or the door is rubbing against the cage. Adjust the hinge alignment or sand down any spots where the door is catching.
Conclusion
Building a rat cage trap yourself is definitely doable with basic materials and tools. The key is getting the trigger mechanism right, which takes some testing and adjustment.
Your homemade trap can work just as well as a commercial trap if you build it carefully and use it correctly. The main advantages are cost savings and the satisfaction of solving your rat problem with something you made yourself.
Whether building your own trap is worth it depends on your skills, available time, and how many traps you need. For people with basic DIY skills who need multiple traps, building your own is a great option that can save you significant money.

Hi, my name is Ezra Mushala, i have been interested animals all my life. I am the main author and editor here at snakeinformer.com.