

Salamanders have a long, slender shape, a soft expression, and small details that make them fun to draw. Whether you’re a beginner or someone with drawing experience, sketching a salamander can help you notice features you might not have paid attention to before.
To draw a salamander, start with basic shapes for the head and body, sketch the limbs and tail, add details like toes and eyes, then outline and color to finish your drawing.
In this post, we’ll guide you through each step of drawing a salamander. We’ll keep the instructions simple, and you won’t need any special tools.
Just a pencil, paper, and a few minutes of your time. This is a calm, relaxing process that anyone can enjoy.
Getting Ready to Draw
Before we begin, it helps to gather your tools. You don’t need anything fancy, just the basics:
- Pencil (preferably with an eraser)
- Paper
- Sharpener
- Colored pencils, markers, or crayons (optional)
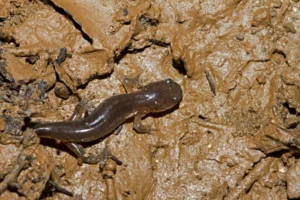
Choose a quiet place where you can draw without rushing. Look at a few pictures of real salamanders if you like. This will help you understand the shapes and colors better.
Step 1: Draw the Salamander’s Head
Start by drawing a small oval shape near the top of your page. This will be the salamander’s head. It should be a bit wider than it is tall.

Don’t worry about getting it perfect. This shape is just a guide for where the head will go. Make sure to leave enough space on the page for the rest of the body and the long tail.
Step 2: Sketch the Body Shape
From the head, draw a curved line going down and to the right. Then draw a matching line next to it to form the body. It should look like a stretched-out “S” or a soft bend.
The body should be longer than the head and gently taper toward the tail. Keep the lines smooth and light so you can adjust them if needed.
Step 3: Add the Tail
Continue the body line into a long, thin tail. Salamanders have tails that can be as long as their body or even longer.
Make the tail curve slightly like a snake or a ribbon. This gives your salamander a sense of movement. Taper the tail to a point at the end.
Step 4: Sketch the Front Legs
Near the head, on each side of the body, draw short front legs.

Start with a line going out from the body, then angle it down. Add three or four small toes at the end. The toes should look like tiny fingers, a bit spread out.
Make sure both legs are about the same size and placed at the same point on either side.
Step 5: Draw the Back Legs
Toward the middle or rear of the body, sketch the hind legs.

These should be slightly longer and more curved than the front legs. Again, add three or four toes to each foot. Salamander anatomy shows that their toes are not webbed and are often rounded at the tips.
Try to keep the limbs soft and relaxed, not stiff or sharp.
Step 6: Add the Eyes
Go back to the head and draw two small circles near the front, one on each side. These are the eyes.
You can leave them as simple circles or shade them in a bit for contrast. Make sure the eyes are not too big. Salamander eyes are gentle and blend into the face.
Step 7: Shape the Face and Body
Now that you have the basic shape, go over the head and body again to smooth out any lines.
You might want to adjust the neck to make it flow better into the body or round out the belly slightly. Erase any overlapping guide lines so your drawing looks cleaner.
Step 8: Outline the Drawing
Once you’re happy with the shapes, go over your pencil lines with a darker pencil or pen to outline the salamander.
Keep the lines soft and natural. Don’t press too hard or make them too thick. This outline will help your salamander stand out on the page.
Step 9: Add Details
Now it’s time to give your salamander some character. You can add:
- Small dots or spots on the back
- A line down the spine or sides
- Wrinkles or folds near the legs
- A soft smile or tiny nostrils on the face
Look at photos of real salamanders for ideas. Some have bright spots, stripes, or smooth skin with just a little texture.
Step 10: Color Your Salamander
This step is optional, but coloring brings your salamander to life.
Choose colors based on a real species, or invent your own. Some popular choices include:
- Red with black spots (like the red salamander)
- Yellow and black stripes (like the tiger salamander)
- Brown and orange tones for forest species
- Greenish hues for aquatic types
Use colored pencils for soft shading or markers for bold lines. Try to blend colors gently where needed.
Different Species, Different Shapes
If you want to try drawing a specific kind of salamander, you can change the shapes a little. Here are a few examples:
- Tiger salamanders have thick bodies and short legs.
- Slimy salamanders are narrow with longer tails.
- Axolotls have external gills and a wide, flat head.
- Newts have rougher skin and a more lizard-like look.
Look at reference pictures to see how each type is shaped.
Drawing in Different Positions
Once you’ve practiced the basic shape, you can try drawing your salamander in different poses:
- Curled in a resting position
- Climbing over a rock
- Swimming with the tail extended
- Walking with one leg lifted
Use light sketch lines to plan the pose before finalizing the outline.
Tips for Improving Your Drawing
Drawing takes patience, and even a simple sketch can take practice. Here are some helpful tips:
- Draw lightly at first. You can always go darker later.
- Use real pictures. Observation helps you learn shapes and details.
- Practice drawing parts separately. For example, try a page of tails or legs.
- Don’t erase too much. Mistakes are part of learning.
- Try different tools. Some people like charcoal, ink, or digital drawing.
Over time, your salamanders will look more natural and lifelike.
Why Drawing Salamanders Can Be Meaningful
Drawing animals is more than just an art project. It helps you notice small features, appreciate different species, and connect with nature.
When you draw a salamander, you see how its toes bend, how the tail moves, and how its body fits into the forest floor or pond. These details matter for both artists and nature lovers.
Sketching a salamander may also lead you to learn more about its habitat and behavior. This can spark interest in conservation or biology.
Using Your Salamander Drawing
Once your drawing is complete, you can:
- Frame it or hang it on a wall
- Turn it into a greeting card
- Use it in a school project
- Share it with others who enjoy animals
- Add it to a nature journal
Your drawing doesn’t need to be perfect. What matters is the care and attention you gave it.
Drawing from Nature
If you’re lucky enough to see a real salamander, try drawing it from life.
Bring a small notebook and pencil on a nature walk. Look under logs or rocks in damp places. If you see a salamander, watch it carefully without disturbing it.
Sketch quickly, focusing on the shape and pose. Later, you can add details from memory or photos. Always remember to leave salamanders where you find them and respect their habitat.
Drawing for All Ages
This step-by-step guide works well for both kids and adults. Younger children may need help with small details, while older artists can add their own style and complexity.
You can also use this method in a group, such as a classroom or art activity. Drawing animals helps students learn science and art at the same time.
Trying Digital Drawing
If you like drawing on tablets or computers, the same steps apply. Use layers for sketching, outlining, and coloring. Most art apps offer brushes that can mimic pencils or pens.
Digital tools allow easy corrections and color changes, which makes them great for practice. Whether you use a pencil or a stylus, the creative process is the same.
Adding a Background
To make your drawing more complete, try adding a background.
Some simple ideas include:
- Forest floor with leaves and twigs
- Pond edge with pebbles and water plants
- Rock surface with moss
- Tree trunk or log shelter
A soft background makes your salamander feel like part of its world.
Turning It into a Series
Once you’ve drawn one salamander, you might want to draw more. Try making a small series:
- One salamander for each season
- Several species in different poses
- A cartoon salamander doing fun things
- A baby salamander growing up over time
This can be a fun way to track your progress and explore new ideas.
Encouraging Others to Try
If you enjoyed drawing a salamander, encourage others to join you. Share your steps with a friend or family member.
Drawing together helps people connect and relax. It’s also a fun way to learn more about the natural world. Even a short drawing session can create calm and joy.
Conclusion
Drawing a salamander is simple when you take it one step at a time. Start with basic shapes for the head and body, then add the limbs, tail, and small details.
Outlining, coloring, and choosing a pose or background can bring your drawing to life. Whether you follow a real species or invent your own, drawing helps you notice and appreciate these fascinating amphibians.
It’s a peaceful and creative way to connect with nature, and anyone can do it. All you need is paper, a pencil, and a few quiet moments to begin.
Hi, my name is Ezra Mushala, i have been interested animals all my life. I am the main author and editor here at snakeinformer.com.